
Upgrading to a massive 34-inch, 38-inch, or even a 49-inch curved ultrawide monitor is one of the most satisfying upgrades you can make to your home office. However, these premium displays present a serious engineering challenge: they are incredibly heavy and have a center of gravity that sits much further forward than a standard flat screen. If you attempt to mount one of these giants incorrectly, the consequences can be disastrous.
A poorly executed installation can result in a sagging screen that constantly droops toward your keyboard, a bent or cracked desk surface, stripped mounting screws, or worse—a catastrophic structural failure that sends a $1,000+ display crashing onto your desktop. Knowing how to mount heavy ultrawide monitor on monitor arm setups safely is essential to protecting your investment and creating a clean, ergonomic workspace. This comprehensive guide will walk you through the process step-by-step, ensuring your heavy display remains rock-solid and perfectly level.
As an Amazon Associate we earn from qualifying purchases at no extra cost to you. Product prices and availability are accurate as of the date shown and are subject to change.
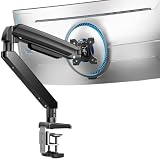

What You Need
Before you begin, gather the necessary tools and equipment. Using the correct gear is the difference between a secure, seamless setup and a frustrating, dangerous failure. Prices for reliable heavy-duty mounting hardware typically range from $40 to $150, which is a small price to pay for peace of mind.
| Item | Why You Need It | Optional? |
|---|---|---|
| Heavy-Duty Monitor Arm | Standard arms support up to 15–20 lbs. You need a specialized arm rated for 35 to 45+ lbs (such as models ranging from $39.99 to $59.99 with dual clamps or reinforced tilt joints). | No |
| Desk Reinforcement Plate | Distributes the weight of the clamp across a larger surface area to prevent thin wood, MDF, or glass desktops from warping or cracking ($15 – $25). | Highly Recommended (No for solid wood) |
| Phillips Screwdriver & Allen Keys | For tightening the VESA plate screws and adjusting the tension screws on the arm joints. | No (Allen keys usually included) |
| VESA Adapter/Spacers | Many curved ultrawides have a recessed mounting area on the back that requires specific spacers or brackets to sit flush. | Yes (Depends on monitor model) |
| A Friend / Helper | To assist with lifting, aligning, and holding the heavy screen while you secure the brackets. | Highly Recommended |
Step-by-Step
Mounting a massive display is a systematic process. Follow these numbered steps carefully to ensure a secure installation. Total estimated time: 45 minutes.
Step 1: Verify Weight Capacity and VESA Patterns
Time Estimate: 5 minutes
Before unboxing anything, locate the weight of your monitor without its original desk stand (this is typically listed in the manual as “weight without stand”). Standard ultrawides weigh between 20 and 30 pounds, while extreme 49-inch gaming displays can weigh up to 37 to 44 pounds. Ensure your chosen arm is explicitly rated to handle this weight. Additionally, verify your monitor’s VESA pattern (typically 75x75mm or 100x100mm) matches the mounting plate of the arm.
Step 2: Install and Reinforce the Desk Clamp
Time Estimate: 10 minutes
Most heavy-duty arms utilize a dual C-clamp or a grommet mount system to anchor to your desk. If your desk is made of particleboard, MDF, or is relatively thin (under 1 inch), place a steel desk reinforcement plate on the top and bottom of the desktop before attaching the clamp. Position the clamp in your desired location, then tighten the hand screws or hex bolts underneath securely. The base must be absolutely rigid; if you can wiggle the base with your hand, it is not tight enough.
Step 3: Assemble the Lower and Upper Arm Segments
Time Estimate: 10 minutes
Slide the lower arm segment onto the base pole, followed by the upper arm segment. Secure them using the provided set screws. Do not tighten the rotation joints completely yet, as you will need some flexibility to position the screen later. If your arm uses a gas spring mechanism, it may be shipped in a compressed state secured by a plastic strap. Cut this strap with extreme caution, as the arm will spring upward with significant force.
Step 4: Attach the VESA Plate and Spacers to the Monitor
Time Estimate: 10 minutes
Lay your ultrawide monitor face down on a soft, flat surface (such as a clean towel, a blanket, or the original foam packaging it shipped in). If your monitor has a recessed mounting cavity, install the manufacturer-provided VESA adapter bracket or plastic spacers first. Align the monitor arm’s VESA plate over the mounting holes. Secure it using the correct length screws (M4 or M5 screws are standard). Tighten them in a cross pattern to ensure even pressure, but do not over-tighten, as you could crack the internal plastic housing.
Step 5: Lift and Mount the Monitor
Time Estimate: 5 minutes
This is where a helper is invaluable. Have one person lift the monitor by its outer bezel while the other guides the VESA plate into the receiving slot on the monitor arm. Once the plate slides into place, immediately engage the safety lock, thumb screw, or locking latch to prevent the monitor from sliding back out. Do not let go of the screen until you are 100% certain the locking mechanism is fully engaged.
Step 6: Calibrate the Tension and Tilt Mechanisms
Time Estimate: 10 minutes
Once mounted, your monitor will likely droop downward or sink to the desk surface. Locate the tension adjustment screw on the main elbow joint of the arm (usually requiring a large hex key). Turn the screw toward the “+” direction (counter-clockwise on most models) to increase the lift strength. Keep turning until the monitor hovers effortlessly in place. Next, locate the tilt joint directly behind the screen. This joint bears the brunt of an ultrawide’s forward center of gravity; tighten this bolt extremely tight so the screen does not tilt forward on its own.
Mistakes to Avoid
- Ignoring the Tilt Joint Weight Limit: Many standard arms claim to support 30 pounds, but their tilt joints are too weak to hold a curved screen upright. Ensure your arm is rated specifically for heavy curved panels (like a 1000R curve) to prevent the screen from permanently drooping forward.
- Mounting to Hollow-Core Desks: Desks made of hollow honeycomb paper (such as cheap flat-pack furniture) cannot support the concentrated clamping force of a heavy ultrawide. The clamp will eventually crush the desk surface and collapse. Use a solid wood desk or a heavy-duty reinforcement plate.
- Forgetting Cable Slack: Ultrawide monitors require significant travel distance when rotated or adjusted. If you zip-tie your cables too tightly to the arm without leaving a slack loop at the joints, you risk ripping the ports out of your monitor or computer when you adjust the screen.
- Skipping the Safety Screws: Many quick-release VESA plates feature a tiny safety screw that locks the plate to the arm. Skipping this step means a simple bump from underneath could slide your monitor off the arm entirely.
How Often
A heavy ultrawide monitor setup requires occasional preventative maintenance to remain safe and functional. Every six months, perform a quick check of the system. Inspect the desktop clamp to ensure it hasn’t slipped or loosened due to daily desk vibrations. Check the tilt and height tension screws; as the internal springs settle over time, they may require a quarter-turn adjustment to maintain their holding power. Additionally, check your desk surface underneath the clamp for any signs of cracking or bowing.
When to Call a Pro or Replace
As we look ahead to 2026, workspace ergonomics are shifting toward even larger, more immersive screens. If you upgrade your monitor to a larger model, do not try to stretch the limits of your current arm. If you notice your monitor arm slowly sinking over a few hours despite tightening the tension screw to its absolute limit, the gas cylinder or mechanical spring has worn out and the arm must be replaced immediately.
You should also consider upgrading your mounting hardware if you notice any structural warping on your desk. If your desk is made of tempered glass or custom stone, do not attempt to clamp a heavy load yourself; call a professional furniture installer to drill a grommet hole or mount a wall bracket instead, as clamping directly onto glass will shatter it.
FAQ
Can I mount a curved 49-inch monitor on a standard single monitor arm?
No. Standard single monitor arms are designed for flat screens weighing under 20 pounds. A 49-inch curved monitor has a massive physical footprint and a center of gravity that sits far forward, requiring a heavy-duty arm designed specifically for high-capacity loads (up to 40+ lbs) and extreme curves.
What is a desk reinforcement plate, and do I really need one?
A desk reinforcement plate consists of two steel plates that sandwich your desk between the monitor arm clamp. It distributes the downward weight and rotational torque across a larger area. You absolutely need one if your desk is made of MDF, particleboard, or thin wood veneer to prevent the clamp from crushing the desk material.
My monitor keeps tilting downward no matter how much I tighten the screw. What is wrong?
This happens because the tilt joint behind the VESA plate is under-tightened or rated for a lighter screen. Ultrawide and curved screens place intense rotational force on this specific joint. You must tighten this bolt much harder than the other joints, often using a socket wrench or the provided heavy-duty Allen key to get enough leverage.
Is a gas spring arm better than a mechanical spring arm for heavy ultrawides?
Both can work, but mechanical spring arms are often preferred for ultra-heavy displays because they do not lose pressure over time like gas cylinders can. However, premium heavy-duty gas spring arms offer smoother, tool-free height adjustments if you plan on changing your monitor’s height frequently throughout the day.
