
Setting up a massive 49-inch ultrawide monitor is one of the most satisfying upgrades you can make to a home office or gaming station. However, that excitement can quickly turn to frustration if your heavy-duty monitor arm refuses to stay at the correct height. When a high-capacity arm is improperly adjusted, the consequences can range from annoying screen drift to catastrophic hardware failure. If the internal tension is too loose, your expensive screen can slowly sink, resting its heavy bezel directly on your desk. If it is too tight, the arm can violently snap upward, potentially damaging your desk surface, stripping the mounting bracket, or causing personal injury.
Adjusting a heavy-duty monitor arm is not quite as simple as adjusting a standard office model. These heavy-duty variants rely on high-tension gas springs or heavy mechanical coil springs designed to counterbalance weights ranging from 30 to over 45 pounds. Balancing these forces requires precision, patience, and the correct technique. This guide will walk you through exactly how to safely calibrate and adjust the height of your heavy-duty monitor arm to achieve a perfectly balanced, ergonomic workspace.
As an Amazon Associate we earn from qualifying purchases at no extra cost to you. Product prices and availability are accurate as of the date shown and are subject to change.

What You Need
Before attempting to adjust a high-capacity monitor mount, gather the correct tools. Because these arms hold significant kinetic energy when compressed, using the wrong tool can easily strip the tension bolts.
| Item | Why | Optional? |
|---|---|---|
| Allen Key / Hex Wrench | Used to turn the primary tension control bolt. Usually 4mm, 5mm, or 6mm (typically included with the monitor arm). | No |
| A Helper | To support the heavy physical weight of the monitor while you make adjustments to the tension joints. | Highly Recommended |
| Soft Blanket or Towel | To lay your expensive monitor face-down on a flat surface if you need to detach it from the VESA plate. | Yes |
| Measuring Tape | To measure your ergonomic eye height relative to the center of the screen (typically 20 to 30 inches from your eyes). | Yes |
Step-by-Step
Follow these steps carefully to ensure you do not damage your monitor or the internal spring mechanisms of the mount.
Step 1: Verify Weight Capacity and Monitor Specs (Time: 5 mins)
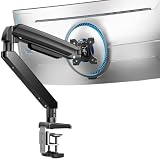
Before turning any screws, make sure your monitor arm is actually rated for your screen’s weight. Using an underpowered arm will cause the monitor to sink no matter how much you tighten the tension. For example, if you are mounting a massive 49-inch ultrawide screen, you need a high-capacity option like the HUANUO TitanLift Heavy Duty Monitor Arm ($97.99), which holds up to 44 lbs and features a dual C-clamp. If you have a slightly lighter setup, an option like the ErGear Heavy Duty Monitor Arm ($39.99), which supports up to 37.4 lbs, is highly capable. Always check your monitor manufacturer’s manual for the exact net weight of the screen without its original desk stand.
Step 2: Secure the Desk Mount (Time: 5 mins)
Ensure that the desk clamp or grommet base is completely secure. Heavy-duty monitors exert immense torque on the edge of your desk. Check that the dual C-clamps or grommet bolts are tightened firmly against the desktop. If your desk is made of a delicate material like thin manufactured wood or glass, ensure you have a reinforcement plate installed to distribute the pressure before you begin moving the arm up and down.
Step 3: Locate the Height Tension Bolt (Time: 3 mins)
Locate the primary tension adjustment screw. On almost all heavy-duty articulating arms, this hex screw is located at the center joint (the “elbow”) of the upper arm segment. This bolt directly controls the gas spring or mechanical coil inside. Do not confuse this with the tilt tension bolt (located directly behind the VESA plate) or the swivel joint screws.
Step 4: Align the Arm Horizontally (Time: 5 mins)
To safely adjust the height tension, the arm must be held in a completely horizontal position, parallel to your desktop. This aligns the internal spring mechanism so that the tension bolt can turn smoothly. Have your helper hold the monitor firmly in this horizontal position to take the weight off the spring while you prepare to use the hex wrench.
Step 5: Calibrate the Tension Bolt (Time: 10 mins)
Insert your hex wrench into the tension bolt. Look closely at the arm’s plastic casing; you will see a “+” (plus) and “-” (minus) symbol printed near the screw hole.
- If your monitor is sinking: You need more tension to counter the weight. Turn the hex key counter-clockwise (toward the “+” symbol) to tighten the spring.
- If your monitor is rising on its own: The spring is too tight for your screen. Turn the hex key clockwise (toward the “-” symbol) to release tension.
Make small adjustments of 2 to 3 full rotations at a time, then gently let go of the monitor to test if it hovers in place. Repeat this process until the monitor floats effortlessly at your desired height.
Step 6: Adjust the Pole Collar (If Applicable) (Time: 5 mins)
Some heavy-duty mounts feature a hybrid design consisting of a vertical metal pole and an articulating arm. If you require a massive height adjustment beyond the range of the gas spring, you must adjust the clamp collar on the vertical pole. Have your helper support the full weight of the screen, loosen the collar bolt, slide the arm assembly up or down the pole to the desired baseline height, and retighten the collar firmly before releasing the screen.
Step 7: Perform the Final Ergonomic Check (Time: 5 mins)
Sit comfortably in your office chair in your natural working posture. The top third of your monitor screen should sit at or slightly below eye level, and the screen should be tilted back about 10 to 20 degrees. This positioning reduces neck strain and prevents shoulder fatigue during long working hours.
Mistakes to Avoid
- Do Not Use Power Tools: Never use an electric drill or impact driver on your monitor arm’s adjustment screws. The high torque of power tools can instantly strip the hex sockets or crack the internal cast-aluminum housing.
- Do Not Over-Tighten: Stop turning the hex wrench immediately if you feel extreme resistance. Forcing the screw past its physical limits can rupture the gas cylinder or strip the internal threads, rendering the arm useless.
- Don’t Adjust Without Supporting the Weight: Adjusting the tension while the full weight of a 40-pound monitor pulls down on the arm can strip the adjustment screw threads and cause the arm to drop suddenly, shattering your screen.
- Ignoring VESA Plate Security: Always ensure the VESA quick-release tab or security screws are locked in place before moving the arm. The physical movement of adjusting height can slide an unsecured monitor right off its bracket.
How Often
Under normal circumstances, adjusting a heavy-duty monitor arm is a “set-it-and-forget-it” task. However, you should inspect and slightly recalibrate your arm’s tension every 6 to 12 months. Over time, the gas in pneumatic cylinders can experience minor pressure changes due to seasonal temperature shifts, causing slight height drift. Additionally, if you transition your workspace to a standing desk, you may find you need to make minor adjustments to the arm’s height and tilt to match your standing eye level.
When to Call a Pro or Replace
While most monitor arm adjustments are easily handled at home, there are times when you should consider replacing your equipment. If you notice oily residue leaking down the arm or pool on your desk, the internal seal of the gas spring cylinder has ruptured. This cannot be repaired, and the arm must be replaced immediately. Similarly, if you hear grinding metal sounds or if the arm remains entirely locked in place despite loosening the tension bolt, the mechanical components have failed. If you are upgrading your workspace for 2026 with a larger, heavier screen, ensure your old mount is retired in favor of a newer model that explicitly supports the heavier payload.
FAQ
Why does my heavy-duty monitor arm keep sinking even after tightening?
If the arm continues to sink, your monitor likely exceeds the physical weight capacity of the arm, or you have not turned the tension screw enough. Heavy-duty arms often require 15 to 30 full rotations of the hex key to build up enough counter-tension for heavy ultrawide displays.
Which way do I turn the hex wrench to support a heavier monitor?
To support a heavier monitor, you must increase the spring tension. Turn the hex key counter-clockwise (toward the “+” symbol) to compress the spring and increase its lifting force.
Can I adjust the height of my monitor arm while the screen is still attached?
Yes, you can adjust the tension while the screen is attached, and it is actually recommended so you can test the balance in real-time. However, you must have a helper support the physical weight of the monitor during the adjustment process to prevent damage to the joint threads.
What is the difference between a gas spring and a mechanical spring monitor arm?
Gas spring arms use a pressurized pneumatic cylinder to provide smooth, fluid movement, making them incredibly easy to adjust on the fly. Mechanical spring arms use heavy-duty steel coil springs, which are exceptionally durable and hold heavy weights for years without losing tension, though they can sometimes feel slightly less smooth to move.
