The best camera backpacks in 2026 balance four things at once: quick access to your gear, customizable divider layouts, weather protection, and weight distribution that keeps a loaded bag comfortable past the first hour. For most shooters, a 20–30L pack with a removable camera cube, a padded laptop sleeve, and either rear-panel or side access covers every scenario below — the real decision is matching capacity and access style to how you actually shoot.
As an Amazon Associate we earn from qualifying purchases at no extra cost to you.
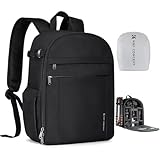
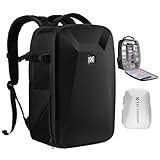
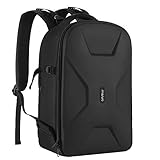

Our Top Picks


Top 3 picks at a glance
How Much Capacity Do You Actually Need?
Camera backpack capacity is quoted in liters, but what matters is how many “pro bodies plus lenses” the dedicated camera zone swallows. A rough planning rule: a mirrorless body with an attached lens takes about 3–4 divider slots worth of space, and each additional lens takes 1–2. That means a kit of one body plus three lenses typically needs a 20L bag minimum, while two bodies and five lenses push you into 30L territory.
Here is a worked example. Suppose you carry a full-frame mirrorless body (≈2 slots), a 24-70mm f/2.8 (2 slots), a 70-200mm f/2.8 (3 slots), a 35mm prime (1 slot), a flash (1 slot), and a drone folded (2–3 slots). That is roughly 11–12 padded cells, which maps to a 25–30L backpack where about 40% of the volume is the camera zone. Buying a 35L bag for this kit adds dead space, which lets gear rattle unless you add extra padding — excess volume is worse than excess padding, because movement is what causes scratches and decentered lens elements.
Access Styles: The Choice That Defines Daily Use
How you get the camera out matters more than most specs. There are three dominant layouts:
- Rear-panel access: The gear compartment opens against your back, so nobody can unzip it in a crowd while you wear the bag. Best for travel and urban shooting; the downside is you must set the bag down (front-face down, which is usually weather-sealed anyway) to get anything.
- Side access: Swing the bag onto one shoulder, unzip a side flap, grab the camera in under five seconds. Ideal for event and street shooters who change lenses on the move. Look for bags where the side flap only exposes one column of dividers so the rest stays protected.
- Top access: A small upper hatch for the body-and-attached-lens, with the deeper kit behind a second zipper. The fastest draw of all, but the shallow zone only fits one body — everything else still needs the bag off your shoulders.
Many 2026-era bags combine two of these: side access for the working camera plus a rear panel for full layout changes at the hotel. That hybrid is the safest default if you shoot a mix of travel and events.
Dividers, Laptop Sleeves, and the Small Details
Adjustable dividers sound identical across products, but two details separate good systems from annoying ones. First, check whether the dividers use a “hinged spine” or origami-style folds — hinged dividers let a telephoto lie horizontally without wasting the cell above it. Second, look for a fully removable camera cube: pulling the cube turns the bag into a normal daypack for non-shooting days, effectively giving you two bags for one price.
On laptop storage, verify sleeve dimensions rather than the “fits 15-inch” label — a 16-inch MacBook Pro or thick gaming laptop needs a sleeve roughly 26 × 39 cm, and some sleeves share the back panel so a loaded camera block presses against the laptop. Better designs put a rigid sheet between the two zones.
Weight Distribution: The Math Nobody Does
A realistic mirrorless kit (body 700 g, three lenses 2.2 kg, tripod 1.4 kg, laptop 1.8 kg, water and accessories 1.5 kg) totals about 7.6 kg before the bag itself — call it 9–10 kg packed. At that load, a waist belt that genuinely transfers weight to your hips (a stiff, padded one, not a stabilizer strap) can move 60–70% of the load off your shoulders. Bags under 20L often skip the hip belt entirely, which is fine under ~5 kg but punishing above it.
Also check harness geometry: an adjustable torso length matters if you’re outside the 170–185 cm range, and load-lifter straps (the small straps above the shoulders) should pull the top of the bag toward you at roughly a 45° angle. If they pull nearly horizontal, the bag is too tall for your torso.
Weather Protection Beyond “Water-Resistant”
Three tiers exist in practice. Basic bags use DWR-coated nylon — fine for 10 minutes of drizzle. Mid-tier bags add PU-coated zippers and sealed seams, surviving sustained rain. The top tier uses tarpaulin or X-Pac-type fabrics where even submerged seams hold briefly. Almost every bag also ships with, or sells, a rain cover — but note that a cover protects the back panel while it’s on your shoulders and nothing else; the harness still soaks. If you shoot in genuinely wet climates, a roll-top-style opening (fewer zipper paths to leak) plus a hip-belt design is worth prioritizing over extra pockets.
Quick Comparison by Shooter Profile
| Profile | Suggested size | Access style | Must-have feature | Typical price range |
|---|---|---|---|---|
| Travel / street, one body + 2 lenses | 15–20L | Rear panel | Theft-resistant zippers, hidden pocket | $120–$180 |
| Wedding / event, two bodies + lenses | 25–30L | Side access | Full hip belt, dual body slots | $180–$280 |
| Landscape / hiking with tripod | 25–35L | Rear or top | Tripod carry, rain cover, frame support | $150–$300 |
| Hybrid shooter (drone + laptop daily) | 25–30L | Side + rear hybrid | Removable cube, 16-inch sleeve | $200–$320 |
| Carry-on air travel | Check 22 × 14 × 9 in limit | Rear panel | Fits under-seat or overhead dimensions | $180–$350 |
Established lines like the Lowepro ProTactic series (modular attachments), Peak Design Everyday Backpack (magnetic-latch top and side access), Shimoda Explore/Action X (adjustable torso, expedition-grade weather protection), and Think Tank/MindShift bags all remain safe reference points in 2026. If none of these fits your budget, any bag meeting the spec classes in the table above — padded rigid dividers, hip belt over 8 kg loads, weather-sealed zippers — will serve well.
What to Check Before Buying
- Fit your largest lens standing upright. A 70-200mm f/2.8 needs roughly 30 cm of interior depth; a 100-400mm or 200-600mm needs 35–45 cm, which rules out most bags under 25L.
- Weigh the empty bag. Over 2 kg empty is a red flag — it eats your airline carry-on allowance and your back.
- Check divider velcro quality. Cheap velcro loses grip after a year of rearrangement, letting cells collapse.
- Confirm the laptop sleeve shares no wall with the camera zone, or accept adding a padded laptop case.
- Look at warranty terms. Reputable camera bag makers commonly offer lifetime warranties on zippers and seams — a useful proxy for build quality.
FAQ
Can I use a regular hiking backpack with a camera insert?
Yes — a padded camera cube inside a hiking pack is cheaper and often more comfortable for long distances, since hiking packs have better suspension systems. You lose fast side access, so this suits landscape shooters who set up rather than street shooters who react.
Is a sling bag enough for a mirrorless kit?
For one body plus two small lenses (under ~2.5 kg), a 5–8L sling is faster to use than any backpack. Beyond that weight, the single-shoulder load causes fatigue within an hour — switch to a two-strap design.
Do camera backpacks count as a “personal item” on flights?
Under-seat dimensions (roughly 45 × 35 × 20 cm on most airlines) accommodate bags up to about 20L. Larger bags count as your main carry-on — fine, but then your second bag must go in the hold, so plan accordingly.